

 |
Mecha Design and Conversion Rules Mk. 4 |
|
-
These rules are an attempt to resolve what, in my opinion, is an serious lack in Palladium Books RPG systems: The ability of the Players or the GM to create custom Mecha. Whether these Mecha are conversions of some anime or manga unit, or they are something entirely new, dreamed up by the creator, the creation of a reasonable set of stats for the new Mecha should not be a hit or miss proposition. The following process is meant to provide a guideline for GM or Player creations.
A Brief Note about the Math: Several times through the construction of the Mecha, you'll see formula's given, and be asked to do some math. Pay careful attention to the Units indicated, and try to follow directions. If something doesn't look right, look at the examples given in the Mecha I've already converted (accessed from links at the bottom of selected conversion pages.)
-
Stage 1: Design Concept
- Mecha Soldier
- Ani-Mech
- Aircraft/Spacecraft
- Mobile Armor
Stage 2: Mecha Construction
- Frame (FT)
- Armor (AT)
- Weight (Bod)
- Calculate MDC
Stage 3: Power and Speed
- Power-plants and Reactor Output
- Running and Leaping
- Thrust and Flight
- External Thrusters
Stage 4: Sensors and Subsystems
- Sensors (Primary and Secondary)
- Subsystems
- Cockpit Design where I stopped.
Stage 5: Fudge Factors
- Core Fighter
- Bolt on Armor
- Reactive Armor
- Stealth Armor
- Transforming Mecha
Stage 1: Design Concept
Okay, so you're ready to build your mecha, but what is it going to be? Well there are several options available, but they basically break down into four choices: the Mecha Soldier, the Ani-Mecha, the Aircraft/Spacecraft, and, lastly, the Mobile Armor.
Mecha Soldier: This is the basic humanoid design that most giant combat robots follow. HOW humanoid it looks it up to you. It could look boxy, sleek, or organic, either way, it's your decision. The only limitation is that it has to have arms, legs, and an erect posture.
Ani-Mecha: Your Animal Mecha design, as seen in Voltron and all the Zoids series. It can be a Gorilla, a Lion, or even a giant slug.
Aircraft/Spacecraft: As the name implies, these are purpose built aircraft or spacecraft. They're the fastest of all the Mecha types.
Mobile Armor: these mecha can range from a simple tank up to a small spacecraft. Sometimes they are 'almost' a Mecha Soldier, but are too big or too strange to fit into that class of mecha.
Know which type of mecha you're designing? Great, write a brief description, so you can refer back to it as you go through the construction. If you're doing a conversion from an existing mecha, write down as many details as you can find. Be sure to make notes of the physical stats of the Mecha, ie, Height, Width, Length, Weight (if given) This is where having a scale model of the unit is sometimes helpful, as many times the only stat available is the Height of the Mecha.
In the following steps you'll generate the stats for your mecha. If you're unsure about what options to choose for your mecha, take a look at the conversions on the main page. At the bottom of each Mecha's page is a link to a step by step guide to the Options and Fudge Factors that were used in its conversion.
Stage 2: Mecha Construction
Step 1: The Frame (FT): The Frame of a Mecha is the inner support structure, just like the frame of a car, truck, or airplane. The Armor and all systems mount on the Frame, so it's seen as the heart, or skeleton, of the mecha. There are 6 basic levels of Frames to construct your Mecha from.
Frame Types:
- Light Frame (FT 14)
- Grunt Frame (FT 17)
- Standard Frame (FT 20)
- Prototype Frame (FT 25)
- Heavy Frame (FT 30)
- Super Heavy Frame (FT 40)
Step 2: Armor Type (AT): Now that we have selected our Frame Type (FR) we need to decide what kind of Armor we place over it. As a General rule, the armor placed on your Mecha can NOT be less than 2 levels below your Frame type, nor more than 1 level above. So, for example, a Prototype Frame (level 4) can be covered in anything from Grunt armor(level2), up to Heavy Armor (level 5)
Armor Type (AT):
- Light Armor (AT 14)
- Grunt Armor (AT 17)
- Standard Armor (AT 20)
- Prototype Armor (AT 25)
- Heavy Armor (AT 30)
- Super Heavy Armor (AT 40)
Step 3: Calculate Weight:
The following Formula is used to calculate the initial Weight of the Mecha you've designed (in Metric Tons). Keep in mind that this weight has nothing to do with the weight listed in the statistics for any given Mecha, they are merely the statistic you need for game-play.
FT + AT = Bod = Weight (Metric Tons)
Step 4: Calculate MDC:
Use the following formulas to calculate the MDC of your Mecha.
(Bod x 2) x Location = MDC
Locations:
1.0 head
0.6 head ornamentation/sensor unit (if any)
5.0 Main body
2.0 Reinforced Pilot's Compartment
0.75 Shoulder Shields
1.4 arms
0.5 hands
2.2 legs
1.3 Wings(if available)
1.6 thruster backpack(if available)
1.0 Gun(base)
1.5 shield(base)
Stage 3: Power and Speed
Step 1: Power-plants and Reactor Output:
There are a lot of different, custom built Power-plants out there, and each has it's own power rating, usually based on the specific requirements or the gimick for the series the Mech is from. Power-plants are, in fact, an integrated power delivery system, that allows the unit to not only move and fight, but provide power to attached weapons, scanners, life-support, and even propulsion.(ie, flight)
Actually getting a usable set of numbers for the purposes of game design is impossible with almost any Anime. I suggest doing some research on sites like http://www.mahq.net to see if there is a rating for the Power-plant (sometimes referred to as a Reactor) your Mecha uses. Many Mech's do NOT have power ratings, as it doesn't seem too important to the series animators. Quite frankly, any number given is likely to be either woefully inadequate to suit our needs. However, for completeness, I keep track of both the Anime source numbers (in the write-ups "Technical Data" area, and the numbers I choose to work with for the game on my sheets (in the "Performance" area)
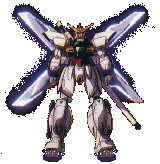
(A perfect example of this is the Wing Gundam Zero, from the Endless Waltz OVA, which is rated at 3732 Kilo-Watts. Quite honestly, for the things this mecha is doing... that seems very underpowered)
Still, you need to call your Power-plant SOMETHING, so I've included some sample names given in various series. You can pick one of these, or come up with your own.
|
Powerplant (Type)
Minovsky type ultracompact fusion reactor (Gundam 0079) Minovsky-Ionesco Ultracompact Fusion Reactor Ultracompact Fusion Reactor (G Gundam, Gundam X) Ultracompact Energy Battery (Gundam Seed) Yggdrasil Drive Superconductor Transfer System(Frde Geass) Yale M7bg (Dougram) Shinnakasu Heavy Industry/P&W/Roice FF-2001 thermonuclear reaction turbine engine(Macross) |
So, now that you've picked a name for your Power-plant, you need to know the Reactor Output, since that will affect how fast your Mecha can react. Use the following Formula to obtain your Reactor Output.
√Bod = Reactor Output (Mega-Watts) (that's the Square root sign)
Step 2: Running and Leaping:
Provided that your Mecha can run at all (again, refer to your reference material) calculating the running speed is covered by the following formula. Once you've obtained your Running Speed, use it to generate your Leaping stats. You'll notice that below a certain size, smaller units, even with lighter armor, tend to run slower than heavier units. This is accounted for by the fact that their Reactors, while providing power for the unit, simply aren't large enough to make them go any faster without tearing the Mecha apart. The converse is true as well: larger units can't hold a big enough power supply to move their mass quickly enough without taking up all the available space in the Mecha.
| Running
Speed Speed (mph) = [200 - (2 x Bod)] x [FT/(AT+10) |
Leaping
Stats are based on your Running Speed
Leaping Up (ft) = 1/2 of your Running Speed (mph) Leaping Across (ft) = your Running Speed (mph) Leaping (Thruster Assisted) = 3x your normal leaping stats |
Note that in the Micro-Gravity environment of space, you could theoretically leap thousands of miles before orbital mechanics drug you down to the surface of a planet or other large body weeks later. Therefore leaps in space are rated for the distance you could cover in the same amount of time as a leap in a planetary environment; a few seconds.
Step 3: Thrust and Flight
Sooner or later you're probably going to want your Mech to fly somewhere. First, if making or adapting your own, determine if it can fly in an atmosphere. Everything flies, or drifts, in a Zero-Gravity environment like space, but not everything flies well. On the Earth, the Moon, or Artificial Worlds, like Space Colonies, many Mecha are capable of at least limited flight.
If your Mech is a conversion, use the source material (Anime/Manga/Movie) to determine if it can fly. Using the formula's that follow, calculate your Thrust. Note, these formulas will use the numbers you've generated for your mecha's statistics, NOT the actual mecha's numbers., and estimate its speed. Keep in mind that in the event your Mech CAN NOT fly, it may still be able to use the available thrust for some sort of ground effect system (hovering).
First, lets determine our Mecha's Thrust.
| Thrust
(kg)
Thrust (kg)= [Reactor (MWatts) / (Bod^2)] x (RunSpd x 100,000) |
ie:
Thrust (kg) = [7.07 (MWatts) / (50^2)] x (71 x 100,000) Therefore in this example Thrust (kg) = 20,078.8 kg |
Now you will need to determine the Speeds for Flying: In Atmosphere and Flying: In Space. (Mach is equal to the speed of sound, in this case 761mph(1225kph) at sea level) (Note that, although the Weight of your Mecha is used in both equations, it's a different version. Flying: In Atmosphere uses the Weight(kg) and Flying: In Space uses the Weight(metric-tons) measure. keep in mind that 1 metric ton equals 1000 kilograms. You'll see in the formula examples below.
| Flying:
In Atmosphere(mach) = Thrust (kg)/ Weight(kg) ie: 20,000(kg)/ 50,000 = 0.4 mach |
Flying:
In Space(mph) = Thrust (kg) / (Weight (metric-tons)^2) ie: 20,000(kg)/2500(mt) = 8.0 mach |
If a Mobile Suits calculated Flight speed is less than 55mph, then it is too massive to attain flight, but can move at 125% of it's (rather slow) Running Speed on Ground Effects.
Step 4: External Thrusters:
External Thrusters are units that are not built into the body of our Mecha, but, rather, are typically accessories that can be attached externally to the Mecha for one purpose. Speed. They can be anything from a Mecha Backpack, to External Boosters or Rocket Pods, to a Hand held thruster unit of some sort. Listed below are the three primary forms of External Thrusters we'll be dealing with.Standard Thruster Backpack: Literally a Mecha scaled backpack, containing a specialized compact reactor and rocket motors to give any Mecha it's attached to a boost when it comes to flying.or leaping. Using a Standard Thruster Backpack increases Flying: In Atmosphere speed to 2.0 times normal, and Flying: In Space speed to 5.0 times normal. Keep in mind, it doesn't HAVE to be a single unit, but could, rather, be two or 3 giant rocket pods located on the Mecha's back.
Non-Standard Thruster Units: these units typically have only limited ability, either running off battery power, a very small (low power) reactor, or using excess power from the Mecha itself. They give only a minor increase in speed, and, instead, provide the Mecha with extra vectoring thrusters to maintain flight and improve mobility.. (A good example of this is the Beam Harmonica of the Gundam X Divider GX-9900 DV) This gives the unit a 1.5x increase in atmospheric flight, and a 4x increase in space speeds. Thruster assisted Jumping is increased by 1.5x as well.
Orbital Thruster Backpack: Need to get that Mecha into ORBIT? Then you need this HUGE Thruster Backpack. This unit packs its own High Power Reactor, or some form of Rocket Fuel which it consumes during the lift phase. This unit is capable of generating SUSTAINED atmospheric speed of Mach 18(needed to achieve orbit), and speed in space a whopping Mach 25, but the Backpack will burn out by the time you get to an orbital altitude of 10,000 miles.
Stage 4: Subsystems and Sensors
Step 1: Sensors (Primary and Secondary)
Every Mecha will come equipped with certain Sensors. Primary sensors are the best sensors that the Mecha has. Long Range, very capable, they will help you win the fight. Secondary sensors are shorter range, less capable, and, when your Primary Sensors are down, will keep you alive. Listed below are the most common Sensors
Radar: Primary 350 miles; Secondary 150 miles
Radio/Video Communications: Primary 1,000 miles; Secondary 50 miles
Combat Operations Computer: Assists the Pilot in identifying and assessing threats, targeting and guiding weapons, and monitoring vehicle performance.
Laser Targeting: Primary 200 miles, Secondary 100 miles.
Advanced Imaging systems: Infrared, Ultraviolet, and Starlight options are available to assist the Pilot in piercing the veil of darkness. Telescopic systems are also integrated into this system.
External Audio System: Sound sensing and amplification(loudspeaker), for picking up a cricket chirp at a half mile, or making yourself heard from the other side of the Grand Canyon.
Radiation and Thermal Sensors: Detects and Warns the Pilot of a wide spectrum of Thermal and Radiological threats.
Gas Chromatograph: analyzes the air around the Mecha, scanning for hazards, toxins, and biological threats.
Electronic Countermeasures (ECM): Chaff, Flares, Jammers and other features that are designed to help evade enemy targeting systems, or launched weapons (missiles)
Step 2: Subsystems:
After the Sensor Suite, every Mecha will also have numerous subsystems built into the Mecha to provide much needed features or creature comforts.Radiation and Thermal Shielding: Protects the Pilot from life threatening levels of Radiation, and the extremes of Heat and Cold.
Independent Air Supply and Filtration: provides fresh clean air in toxic or hazardous environments. (ie Vacuum) Can recycle the air for up to 6 weeks before needing recharging.
Anti-theft System: Either a voice activated, passworded, keyed, or biometric system used to keep the Mecha safe and secure.
Eject Seat / Escape Pod: Your last resort when the Mecha is about to be destroyed.
Spotlights: Visible light, Infrared, and UV lights to help the Pilot see better at night.
Lift Wire: A way to get into the Pilot's compartment, since cockpits are so far off the ground.
Micro Manipulators: small helping hands that can manipulate small objects like a human hand would. Useful for repairing another Mecha, or opening a door without punching a hole in the wall.
Stereo System: you gotta have your battle music.
Storage Unit: What if you want to store your motorcycle in your Mecha, or maybe just a change of cloths.
Step 3: Cockpit Design Where I stopped.
Now that you have all your Sensors and Subsystems, you need somewhere for your Pilot to sit. That's the Cockpit. There are several different design styles, but they all tend to fall into a few basic categories.
Open View CockpitCommand Console Cockpit
Virtual Environment Cockpit (either a ball, or VE helmet)
Newtype Controls (aka Flash System)
Stealth systems
Optional: Core Fighter: Some Mechs have a small aircraft that makes up part of the main body. If your Mech has a 'Core Fighter' then reduce the Main Body MDC to 55% of its original MDC, and add a Core Fighter with the same MDC. During combat, damage will be split between them equally. The Reinforced Pilot's Compartment is the cockpit of the Core Fighter. When the Core Fighter's MDC is above 15% it can separate from the Mecha, leaving behind the vacant hull, and move about independantly. Inversely, when the Core Fighter's MDC falls below 40%, and it is seperated from the main Mech, it is too badly damaged to link back to the original Mech
Optional: Bolt on Armor: Although not common in most Mecha Genre's it is found often enough to need to be covered here. Bolt on Armor adds an additional 25% MDC to the body part it protects. All damage to that part of the Mech comes off the Bolt on Armor first. When the Bolt on Armor in any area reaches 0, any further damage comes off the piece of the body that was covered by it. Also, unless the player blows off or otherwise removes the destroyed armor, it will reduce speed and mobility by 15%.
Optional: Reactive Armor: Even more uncommon than Bolt on Armor, Reactive Armor is armor that in some way destroys itself for specific purposes. Typically it is armor that has shaped explosives in it to defeat specific types of threats. (ie Anti-Missle armor detects the impact/approach of a missle and blows itself up in such a way that the armor protected beneath is unharmed but it and the missle are destroyed). If an attacker uses a type of attack the Reactive armor is rated for, the Reactive Armor can defeat the specified attack ONCE, before it is destroyed completely (vanishing from the area of the body it is listed on. Other Reactive Armor on the same Mech however remains unharmed by this defeated attack). Reactive armor has a chance of misfiring (if the attacker rolls a natural 19, or 20, and the player is not actively using parry, dodge, or roll) and being destroyed by attacks it was not designed to deal with. Reactive Armor adds an additional 10% MDC to the body part it protects. When this MDC is depleated the Reactive Armor detonates cleanly, causing no additional damage to the protected Mech, but, damaging anything else within a 50 foot radius with explosive damage equal to 1D6+1MD.
The Fudge Factor: Optional
[w]First Production Model (AT -0.2)
[x]Mid Season Upgrade (AT +0.2)
[y]Next Season Upgrade (AT +0.25)
[z]Crazy Engineers (AT -0.3~+0.4) *
*[z] Crazy Engineer Mods can make upgrades in armor that might make the Mech faster, slower, resistant to certain weapons, or some other effect. Work with your GM to determine whether its a bonus or a detriment to the Mechs MDC. (Randomly roll 1d8 if creating random Mech's and you're just doing this for variety)
Obtain your Armor Mod (AM) from the table below.
| Gundanium Alloy (AM = 0.2) | Lunar Titanium (AM = 0.4) |
| Titanium (AM = 0.7) |
Hardened Steel (AM= 1.0) (Gundam 0079 class units) |
Stage 1 Weapons: Stuff everybody has access to, that is a standard weapon you'd find on most mecha. ie: beam rifles, beam sabres, Head vulcans. (low damage)
Stage 2 Weapons: Second Generation stuff, and things that pack a bigger punch. ie: the beam cannon, Bazooka, and Dober Gun (see the Tallgeese description)
Stage 3 Weapons: okay, well only the 5 gundams typically have access to these, as they can take out other mobile suits in one shot. ie: the beam scythe, and buster rifles of Deathscythe and Wing Gundams. (note: these weapons are powerful but one of a kind)
Stage 1 MDC: [140 to 250]weak and cheaply built mobile suits, no better than Zentraedi Mecha (note: I referenced the Macross II books during construction, so....)150(bp) 250(obp) 200 (pa) 200(mpa) 140(mk1-Zpa) 160(mk1-Mpa)
Stage 2 MDC: [300 to 475]second gen Mobile Suits, Taurus, Virgo, Virgo II; about the same as Marduk Mecha and Standard Valkyries. 300(at-valk) 350(spc valk) 340 (MdkOPA) 400 (MdkCPA) 350(tomahawk) 400(Defender) 450 (Phalanx) 450(VF-XX) 325(MdkAnn)
Stage 3 MDC: [500 to 750 typically, but can be 1000]All the Gundams, Epyon, and Tallgeese I & II; on a par with HEAVILY armored Valkyries, or certain Destroids. 520(MtlSirn) 580 (Valk-SAP) 620(Valk-SSF) 750(Monster)
Bod x AM = Weight (Metric Tons)
Back to Top |
Back to the Main Page |